What is Inventor?
Inventor is an online software that allows people to design 3-D models. Users can use a variety of different features to create parts, assemblies, technical drawings, and animations. Inventor can be used to plan out part designs and can be used to 3-D print objects. Inventor allows for people to use their creativity to design whatever they want.
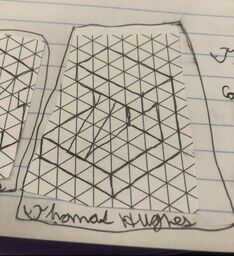
I first had to sketch out the widgets before I could create them on Inventor.
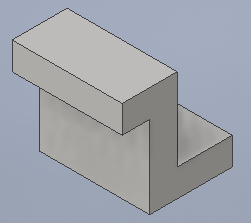
Process to Create Widget #2
The first project I had in class was to sketch 6 widgets and then create them on Inventor. The process to create one of the widgets will be below.
1. Sketch out the widget on isometric graph paper.
2. Open Inventor and create a new part.
3. Start a new 2-D sketch and select the X-Y plane.
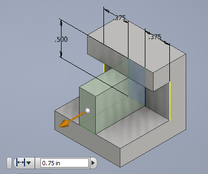
4. Sketch out the general outline of the widget, then dimension the lines to get the correct size and shape.
3. Start a new 2-D sketch and select the X-Y plane.
4. Sketch out the general outline of the widget, then dimension the lines to get the correct size and shape.

4. Finish the sketch, and extrude it by 1 inch.
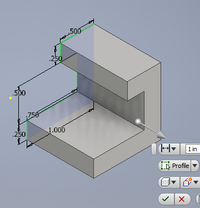
5. Start a new sketch on the inside face.
6. Draw a rectangle that is flush with the bottom and upper edges.
7. Dimension the rectangle to be centered on the center face.
6. Draw a rectangle that is flush with the bottom and upper edges.
7. Dimension the rectangle to be centered on the center face.
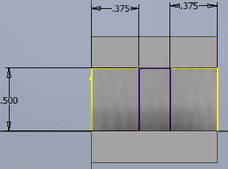
8. Finish the sketch and extrude the rectangle out by 0.75 inches.
9. Begin a new sketch on one of the sides of the extruded rectangle.
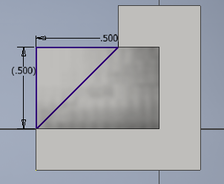
10. Sketch out a triangle that connects to the outer-bottom corner of the rectangle and the point where the upper edge connects to the rectangle.
11. Dimension both legs of the triangle to be 0.5 inches.
10. Sketch out a triangle that connects to the outer-bottom corner of the rectangle and the point where the upper edge connects to the rectangle.
11. Dimension both legs of the triangle to be 0.5 inches.
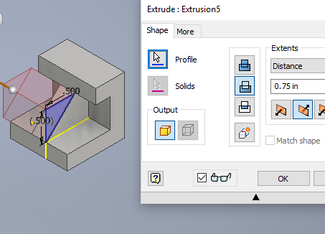
11. Cut the triangle out of the rectangle using the cut out extrusion feature.
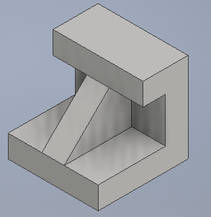
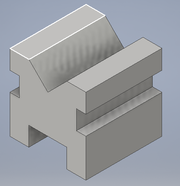
12. Finished widget.
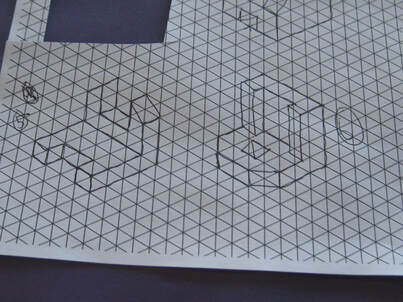
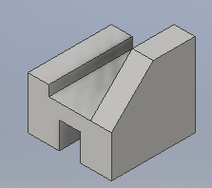
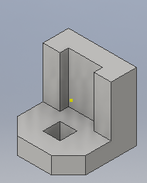
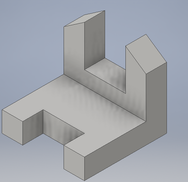
The other 5 widgets
|
|
|
|
|
3-D Printing
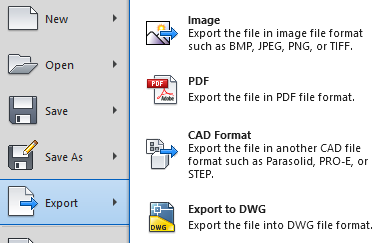
After designing all the widgets, I began working towards 3-D printing widget 2. I began by exporting widget 2 as an .stl CAD-format file from Inventor.
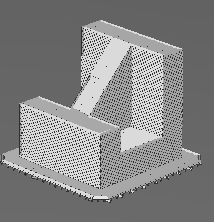
I then opened MakerBot desktop, and prepared the widget for 3-D printing.

I exported the MakerBot file and saved it to my flash drive. The file had a printing preview, which is shown below.
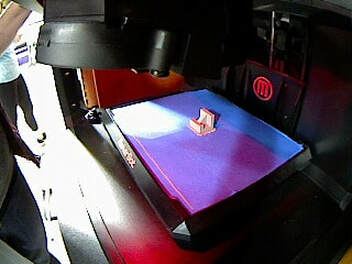
Then, I prepared the part on the 3-D printer and began printing.
|
|
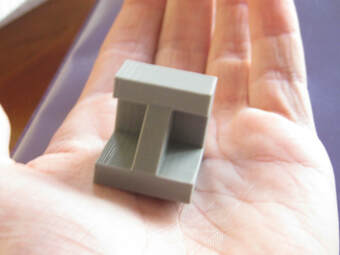
3-D printed widget.
Conclusion
Since I have used Inventor before, this project allowed me to refresh my skills with it. However, the MakerBot software was new to me, and I was able to learn how to do it. I learned how to export MakerBot files and save them to a flash drive. Finally, I learned how to use the 3-D printers to print projects.
